Internet is the requirement of today’s era. We cannot work without internet access especially for those who prefer Work from home culture. We can understand WiFi Connected but no internet windows 10 issue is really frustrating.
The reason behind such an issue can be various like it can be because of router or system. In some cases, the reason can be both. We advise you to try all the fixes because anyone out of these will surely work for you.
Table of Contents
WiFi Connected but no internet windows 10: Problem Overview
In Wi-Fi Connected but no internet windows 10 issues, users are unable to access the internet even though Wi-Fi is connected. This issue has been faced for a long time. Some of the possible reasons are mentioned below:
WiFi Connected but no internet windows 10: Related Problems
The same issue has been faced by various users in other forms. Below mentioned errors below are the same. Just follow all the methods mentioned in this blog for these as well.
- Laptop Wifi connected but no internet (HP, Dell, Lenovo, Asus, Acer, etc)
- PC Wifi connected but no internet
- Wifi connected no internet access
- Wifi connected but no internet access windows 10 & windows 7
- Network icon says no internet access but I am connected windows 10
- No internet access but connected
- Hotspot connected but no internet access windows 10
- Connected to internet but cannot access websites windows 10
Basic Troubleshooting
At first, we would advise you to check whether the issue is with the Router or his system. For this try connecting your router or modem with other devices like a mobile phone or another computer.
In case the internet worked on other devices that mean there is an issue with systems driver or configuration.
In case you are still unable to use the internet that means the issue is with your router or modem or hotspot.
-
If the issue is with your device
Now if the problem is with your device then before going for any advanced troubleshooting just perform this method.
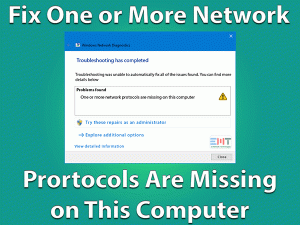
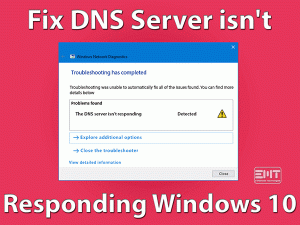
- Look at your task tray and locate network icon present in the bottom right then Right-tap on it.
- Now, choose the “Troubleshoot Problems” option.

- Windows will automatically start to analyze the issue. This also automatically fixes the minor bugs.
In case it doesn’t fix the issue, it will display you the problem. So, you can work on it later on.
-
The issue with your Internet Provider
Sometimes there is no system interference. The “Wi-Fi Connected but no internet in windows 10” issue is because of external or internal reasons related to routers. Your Internet provider can be the reason behind this issue.
External reasons can be broken cable, area, etc. The area also matters. Like in the case of routers or matter you have to check whether the location is good or not. If the location is not in the range of receiving signal then access can be difficult.
For this check on the indicator lights of your modem or router are they on or not. Also, make sure there is no flicking of lights.
Steps to Fix WiFi Connected But No Internet Windows 10
After doing the above, still, the issue “Wi-Fi Connected but no internet in windows 10” is not fixed then go for these methods. Make sure you are performing all the steps correctly.
- Step-1 : Power Cycle your Router or Modem
- Step-2 : Power Cycle the System
- Step-3 : Change DNS to automatic
- Step-4 : Delete Temp files
- Step-5 : Deactivate IPv6 of the system
- Step-6 : Reset the Network Adapters
- Step-7 : Consider Resetting the IP address
- Step-8 : Update Network Driver
- Step-9 : Consider changing your DNS again
- Step-10 : Modify the default power-saving power plan
- Step-11 : Disable the Antivirus
-
Step 1
Power Cycle your Router or Modem
Rebooting your modem and routers can help you with this. Plug out your modem and router out of the socket. After waiting for a few minutes plug in all the cords. Minor issues get fixed by this.
You can also consider rebooting your router by pressing the power toggle for 30 seconds. This will automatically reset and fix the minor bugs.
-
Step 2
Power Cycle the System
After rebooting the network equipment just go for a system reboot. Turn off your system. And unplug all the cords. Remove all the connections like Printer etc. Leave it for 5 minutes. After this plug-in all the cords and turn on your system.
Connect your routers as well and try using Wi-Fi to check whether the issue got fixed or not. Many users reported that their issue got fixed after complete the Power Cycle.
-
Step 3
Change DNS to automatic
DNS plays an important role in the network accessing process. Let’s try changing it to automatic. This hack has worked many; I hope it will work for you as well.
Follow the below steps to perform this:
- Press the Windows logo key with alphabet “R” and type “control” then press Enter.

- Look for “Network and Sharing Center” and tap on it.
- Now, tap on “Change Adapter Settings” present in the left pane.
- Right tap on “Wi-Fi Connection” and choose “Properties”.

- Look for “Internet Protocol Version 4(TCP/IPv4)” present under the Networking tab and choose it then tap on “Properties” toggle.

- Now a box will pop up. Look for “Obtain IP address automatically” and “Obtain DNS server address automatically” available below General tab. Mark both of these.
- Now tap on the “Advanced..” toggle present in the bottom right of the same box.
- Now switch to the “DNS” tab and look for “Register this connection address in DNS”. Unmark this option and tap OK toggle then exit.
After this restart your system and try to access your internet over Wi-Fi. Many users issue “Wi-Fi Connected but no internet windows 10” got fixed just by performing this. In case this doesn’t help you go for our next method.

-
Step 4
Delete Temp files
Temp files are the trash, which needs to be deleted. This can cause unnecessary conflicts while using other functions. “Wi-Fi Connected but no internet windows 10” issue can be the result of this.
Follow below steps to delete temp files:
- Tap on the Windows logo key with alphabet “R” and type “%temp%” press Enter.

- A window will pop up containing temp files. Press the “Ctrl” key with alphabet “A” and press the Shift + Delete key together.
- Any confirmation box pops just press ok. You can also skip the files which are not being deleted.
Sometimes this simple hack fixes up the issue. IN case it doesn’t then go for the next method.
-
Step 5
Deactivate IPv6 of the system
Internet protocol versions are responsible for the amount of data it can carry. IPv6 is the latest version of Internet Protocol but still, most of the network is using IPv4. So disabling IPv6 may fix the issue “Wi-Fi Connected but no internet windows 10”.
Do follow the below steps to perform it.
- Tap on the Windows logo key with alphabet “R” and type “ncpa.cpl” in the run box.

- Choose the connection you are using, right-click on it, and choose Properties option.
- You will find an option under “this connection uses the following items” named “Internet Protocol Version 6(TCP/IPv6)”, unmark it to disable.

- Tap the OK toggle to apply these changes.
Now check whether the error is resolved or not. In case it doesn’t do go for the next method.
-
Step 6
Reset the Network Adapters
As per users report, resetting the network adapter can fix “Wi-Fi Connected but No Internet Windows 10”. Follow below steps to perform this resetting.
- Tap on the Windows logo key with alphabet “X” and choose “Command Prompt (Admin)” from the list.

- Now write the following commands one by one and press Enter key after each command for successful execution.
Commands:- netsh winsock reset.

- ipconfig /release.

- netsh int ip reset.

- ipconfig /flushdns.

- ipconfig /renew.

- netsh winsock reset.
- Once it is finished, type “Exit” and press Enter.
- After this just “Restart” your system.
Check if the issue got fixed or not. In case the problem persists then go for the next Method.
-
Step 7
Consider Resetting the IP address
The configuration is an important thing. Any kind of Misconfiguration in IP addresses can unstable your Wi-Fi connection. We are adding some commands below; you need to follow it.
Follow below steps to reset IP address:
- Tap on the Windows logo key with alphabet “X” and choose “Command Prompt (Admin)” from the list.
- Type following commands one by one and press Enter after every entry.
Commands:- ipconfig/flushdns
- nbtstat -R
- nbtstat -RR
- netsh int ip reset c:\resetlog.txt.

-
netsh winsock reset
- Now close the Command Prompt and Tap on Windows logo key with alphabet “R”.
- Type “Control”, press Enter. Then Choose “Network and Sharing Center”.

- Now tap on “Change Adapter Settings” in the left pane.
- Right tap on the “Wi-Fi Adapter” and choose “Disable”. After this wait for 30 seconds and “Enable” it.

I hope that you are able t0 reconnect to the Internet from these solutions. If you have any queries regarding these methods tell us in comments.
-
Step 8
Update Network Driver
An outdated driver can cause the issue “Wi-Fi Connected but no internet windows 10”. Compatibility issues can occur due to an outdated driver. Network Drivers are the main thing for good connectivity. WE advise you to first download the Network Driver from the official website. Once you downloaded it go for the below steps.
Follow the below steps to perform the update:
- Tap on the Windows logo key with alphabet “X” and choose “Device Manager”.
- Now choose “Network Adapters” and expand it.
- Right-click on it and choose “Update Driver” option.

- A window will pop up with two options. Just tap on “Browse my computer for driver”. Tap on Browse toggle and locate downloaded then select the downloaded driver.
Generally, updates fix up normal bugs do check after upgrading. In case the issue persists go for the next method.
-
Step 9
Consider changing your DNS again
DNS is a basic requirement to establish a good connection. Just change DNS settings to increase the speed. As before we set it Automatic, in case that doesn’t worked for you then go for this to fix “Wi-Fi Connected but no internet windows 10” issue.
Follow the below steps to change DNS:
- Press the Windows logo key with alphabet “R” and type “control” then press Enter.
- Look for “Network and Sharing Center” and tap on it.
- Now, tap on “Change Adapter Settings” present in the left pane.

- Right tap on “Wi-Fi Connection” and choose “Properties”.
- Look for “Internet Protocol Version 4(TCP/IPv4)” select it and choose “Properties” toggle.
- Tap on “Use the following DNS server addresses” and fill the following details:
Preferred DNS server: 8.8.8.8
Alternate DNS server: 8.8.4.4
After filling up these values press Apply and then Ok to save the changes.
Once done check whether the issue got fixed or not. In case still issue is not fixed go for our next solution.

-
Step 10
Modify the default power-saving power plan
Power saving plans in Windows operating system can be conflicting here. Sometimes due to power saver connectivity issue can occur because power saver can turn off 802.11 to save power without your consent the 802.11 goes in sleep mode. This thing can trouble you in establishing a stable connection to access internet. We need to modify the settings so that it can perform at maximum.
Do the below steps to change the default power-saving plan:
- Tap on the Windows logo key with alphabet “X” and choose “Power Options” from the list.
- Whatever plan you have selected, look for “Change Plan settings” available on the right side and tap on it.

- A window will open up, now tap on “Change advanced power settings” option.

- A dialogue box will appear, tap on “Wireless adapter Settings” you will see the “Power saving mode” option, again tap to expand it.
- Now look next to “On battery”, tap there and choose “Maximum Performance” and press OK toggle to apply changes.

Once it is done check whether your Wi-Fi started working or not after connecting. Usually this minor thing fixes the “Wi-Fi Connected but no internet windows 10” issue.
Disable the Antivirus
Sometimes antivirus is the culprit. We would advise you to turn your antivirus off o a temporary basis. In many cases, this has worked. Many times the firewall component of your antivirus stops some functions. You can also simply take network options out of the Firewall settings.
Note: Using the internet without antivirus can be harmful, so in case after disabling antivirus it worked. Then just replace your antivirus with a new one to prevent your system from virus attack.
Tips To Avoid WiFi Connected But No Internet Windows 10 Problem
Contact Official Support
In case “Wi-Fi Connected but no internet windows 10” issue is still persisting then maybe the issue is bit technical. We would advise you to go for technical support. After performing these methods one thing you will get sure about is the reason behind the issue, if the issue is because of the system then contact your systems manufacturer’s official support like Dell Support, Hp Support, etc.
- In case you find the issue is with your network provider then look for their official support website. This will surely help you out.
- In case both system and router or modem is the culprit then go for both the support system one by one and check if the issue got fixed or not.
Final words: Conclusion
You don’t need to worry as the methods are pre-tested. Just make sure you are using the incorrect way. We advise you to perform basic troubleshooting before going for anything else in this blog. In case you stuck at any steps do let us know via comment.
As per our knowledge, your issue must get fixed after using the above methods. In case the issue “Wi-Fi Connected but no internet windows 10” got fixed. Give us your valuable feedback with the method number in our below comment box.